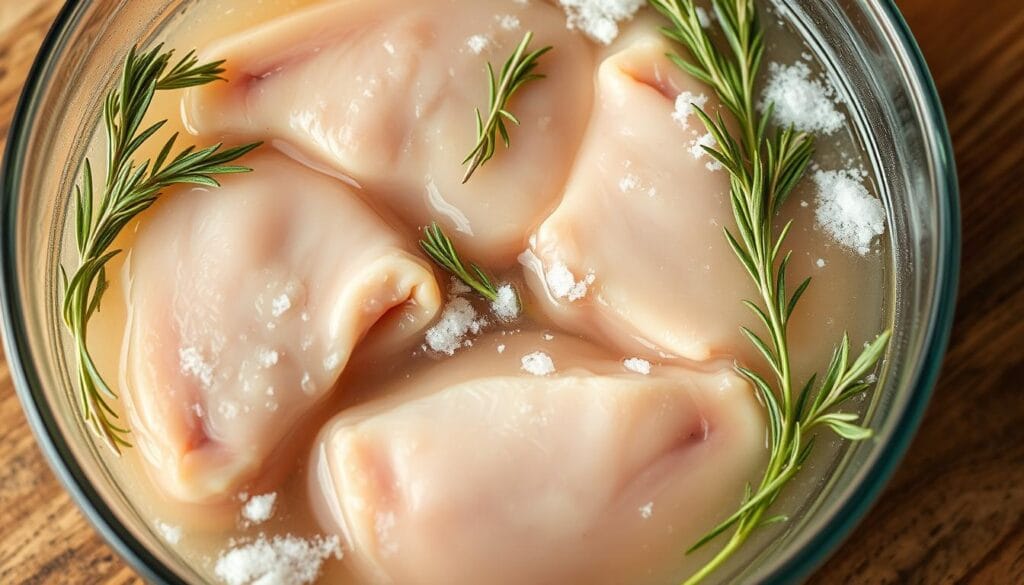
As a busy parent, finding time to cook delicious chicken can be tough. But, there’s a simple trick to make your chicken breasts tender and flavorful. This trick is called brining, and it’s a game-changer.
Brining involves soaking chicken in a salt-water solution. It’s a secret used by professional chefs for years. This method makes the chicken moist and flavorful. The salt in the brine seasons the meat from the inside, ensuring every bite is perfect.
Key Takeaways
- Brining chicken in a salt-water solution creates incredibly moist and tender meat.
- The brine helps to season the chicken from the inside out, adding a delicious depth of flavor.
- Brining is a simple technique that can transform your chicken dishes, making them restaurant-quality.
- This quick chicken brine recipe takes just a few minutes to prepare and can be used for a variety of chicken cuts.
- Brining is a game-changer for busy home cooks who want to elevate their chicken dishes with minimal effort.
Get ready for the juiciest, most flavorful chicken you’ve ever had. With this simple brine recipe, you’ll achieve chicken perfection quickly. Let’s explore how to cook chicken that’s tender and delicious every time.
What is Brining and How It Works
Brining is a simple yet effective technique that can transform ordinary meats into juicy, flavorful delights. This process involves soaking your chicken, pork, or other lean proteins in a salt-based solution before cooking. By immersing the meat in this brine recipe, you unlock several key benefits that enhance the overall texture and taste.
Meats Soak Up Salt Water, Resulting in Added Moisture
When you brine meat, the salt water is absorbed into the muscle fibers. This adds moisture and prevents the meat from drying out during cooking. This is especially helpful for lean cuts, which can easily become dry and tough without this extra step.
Salt Changes the Texture, Making the Meat More Tender
The salt in the brine solution alters the structure of the proteins in the meat. It breaks down the muscle fibers, resulting in a more tender, succulent texture. This transformation occurs as the salt interacts with the meat, making it a valuable technique for ensuring your chicken, pork, or other lean proteins are consistently tender and delightful.
Salt Seasons the Meat from the Inside Out
By brining your meats, the salt penetrates deeply, seasoning the protein from the inside out. This means your finished dish will be infused with flavor, rather than just having a surface-level seasoning. The result is a truly remarkable taste experience that elevates your cooking to new heights.
Brining is a simple yet powerful technique that can make a world of difference in the taste and texture of your meats. Whether you’re preparing chicken, pork, or other lean proteins, incorporating this brine recipe into your cooking routine is sure to deliver juicier, more tender, and better-seasoned results every time.
“Brining is a game-changer for lean meats, locking in moisture and amplifying the natural flavors.” – Food Enthusiast Magazine
The Brine Recipe
Making the perfect brine is key to tender, flavorful chicken. The basic mix is water and salt. You can add extra ingredients to boost the taste.
Standard Brine Ratios
The basic brine mix is 4 cups of cold water and 6 tablespoons of Diamond Crystal kosher salt. Or, use 4 1/2 tablespoons of Morton’s kosher salt, or 3 tablespoons of fine or table salt. Just stir until the salt dissolves.
Optional Brine Ingredients
To add more flavor, you can include:
- Peppercorns
- Crushed garlic
- Rosemary
- Thyme
- Sage
- Bay leaves
- Other herbs and spices
These add-ons season the brine recipe and spread flavor through the meat. This makes the brine ingredients more flavorful and the brine ratios better.
“Brining is the secret to juicy, tender chicken every time.”
Warm vs Cold Water for Brining
Brining with cold tap water makes chicken tender and juicy. Warm water, on the other hand, doesn’t allow as much brine into the meat. This is because warm water expands the chicken’s molecules, blocking brine penetration.
Cold water brine dissolves salt slower but gives better results. It makes the chicken more tender and flavorful. The cold temperature helps the brine soak into the meat, keeping it moist and full of flavor.
Cold Water Brine Produces Better Results
Cold water is denser than warm water. This density lets it penetrate the chicken better. As a result, the chicken becomes more moist, tender, and flavorful.
For the most tender and juicy chicken, use cold water in your brine. The extra time it takes for the salt to dissolve is worth it. You’ll get a dish that’s moist and full of flavor.
“The cold water brine resulted in superior texture and moisture levels in the final cooked chicken.”
Brining Times for Chicken Breasts
Brining chicken breasts works best in 30-60 minutes. A 15-minute brine gives a light flavor with no texture change. But, a 30-minute brine makes the chicken perfectly seasoned, juicy, and tender.
A 1-hour brine is the sweet spot. It makes the chicken tender and flavorful. Brining for 2 hours can make it slightly salty but still moist and tender.
Brining for more than 2 hours isn’t good. A 4-hour brine makes the chicken too salty and chewy. An 8-hour soak makes it spongy and not good to eat. The best brining time is 30-60 minutes for perfect chicken breasts.
| Brining Time | Flavor | Texture |
|---|---|---|
| 15 minutes | Lightly seasoned | No noticeable change |
| 30 minutes | Perfectly seasoned | Juicy and tender |
| 1 hour | Perfectly seasoned | Juicy, tender, and flavorful |
| 2 hours | Slightly salty | Incredibly moist and tender |
| 4 hours | Overly salty | Deli-like texture |
| 8 hours | Excessively salty | Spongy and inedible |
The best time to brine chicken breasts is 30-60 minutes. This time lets the meat soak up flavors, becoming perfectly seasoned, juicy, and tender.

brine recipe
Making chicken breasts moist and flavorful is simple with a good brine. The secret is the right mix of water and salt. This mix lets the meat absorb moisture and seasonings from the inside.
To create the brine, you’ll need:
- 4 cups cold water
- 6 tablespoons Diamond Crystal kosher salt (or 4 1/2 tablespoons Morton’s kosher salt, or 3 tablespoons fine or table salt)
Mix the salt and water until the salt dissolves completely. And that’s it – your brine is ready!
The brine’s ratio is 4 cups of water to 6 tablespoons of kosher salt. This makes a 3% salt solution, perfect for chicken breasts. It seasons the meat from the inside, making it tender and juicy.
To use the brine, just soak your chicken breasts in it. Then, refrigerate for 30 minutes to 1 hour. This time is just right, avoiding too much saltiness.
After brining, cook the chicken as you like – bake, grill, or sauté. The brine keeps the chicken moist and tasty, no matter how you cook it.
Can You Freeze Brined Chicken?
Yes, you can freeze brined chicken! Brining makes chicken juicy and flavorful. Freezing it is a smart way to keep it ready for meals.
Freezing Brined Chicken
Drain off the brine and pat the chicken dry after brining. Then, put it in an airtight container or freezer bag. It can stay in the freezer for up to 6 months.
When you want to cook it, thaw it in the fridge overnight. The brine stays in the meat, keeping it moist and tender.
But, remember to use it within 6 months. Freezing can change the meat’s texture over time.

“Brining is a game-changer for chicken, and freezing brined chicken is a great way to make the most of this simple technique.”
If you know how to brine chicken, freezing it is a good idea. Just make sure to use it within 6 months for the best taste.
Cooking Methods After Brining
After brining your chicken, it’s time to cook it to perfection. You don’t need to rinse off the brine. The meat is already seasoned from the brining process. Just pat the chicken dry with paper towels and cook it your way, whether baking, grilling, or another method.
Baking Brined Chicken
Baking is a great way to cook brined chicken. Heat your oven to 400°F (200°C). Place the chicken on a baking sheet or in a roasting pan. Cook until it reaches 165°F (74°C), about 30-40 minutes for breasts or 45-60 minutes for a whole chicken. The exact time depends on the chicken’s size and cut.
Grilling Brined Chicken
Grilling is another excellent choice for cooking brined chicken. Preheat your grill to medium-high heat. Lightly oil the grates to prevent sticking. Cook the chicken for 6-8 minutes per side, until it reaches 165°F (74°C). Keep an eye on it and adjust the heat to prevent burning.
Other Cooking Methods
- Sautéing: Heat a tablespoon of oil in a skillet over medium-high heat. Add the chicken and cook for 4-6 minutes per side, or until the internal temperature reaches 165°F (74°C).
- Pan-frying: Heat a quarter-inch of oil in a skillet over medium-high heat. Add the chicken and cook for 4-6 minutes per side, or until the internal temperature reaches 165°F (74°C).
- Air frying: Preheat your air fryer to 400°F (200°C) and cook the chicken for 12-15 minutes, flipping halfway through, or until the internal temperature reaches 165°F (74°C).
Choose your cooking method wisely. Avoid adding extra salt to your brined chicken recipes. The meat is already seasoned, so don’t overdo it with salt.
Brining Safety and Storage
When you brine chicken or other meats, keeping food safe is key. If the brine solution sits at room temperature for over 30 minutes, refrigerate the meat. This step stops harmful bacteria like Campylobacter and Salmonella from growing.
Brined chicken can stay in the fridge, covered, for up to 3 days. Or, you can wrap it well and freeze it for up to 2 months. Always clean any surfaces that touched raw chicken to prevent contamination.
Following safe brining practices ensures your meat stays tender and flavorful. By sticking to these guidelines, you can safely add brining to your cooking routine.
FAQ
What is the standard brine recipe for chicken?
Can you brine chicken and then freeze it for later use?
Do I need to rinse off the chicken after brining?
What are the key things to keep in mind for brining safety and storage?
When it comes to brining, safety and storage are paramount to ensure the integrity of your food and prevent any foodborne illnesses. Understanding how to properly handle brine solutions is essential for successful brining techniques. First, make sure to use a clean container that is non-reactive, such as glass, plastic, or stainless steel, when preparing your brine. This helps to prevent any unwanted chemical reactions that could compromise the flavor or safety of the food. Always ensure that the brine is kept at a safe temperature, ideally refrigerated, to limit bacterial growth.
Once your protein—be it chicken, pork, or vegetables—is immersed in the brine, storage becomes a key factor. For meats, it’s best to marinate them in the refrigerator rather than at room temperature, as this substantially reduces the risk of contamination. After the brining process, ensure that any leftover brine is discarded; it should not be reused for further brining or as a cooking ingredient unless it has been boiled and cooled. Before cooking, it’s advisable to remove excess brine and pat the protein dry, as this not only promotes even cooking but also prevents any potential oversalting.
It’s also important to keep in mind the shelf life of your brined food once it has been prepared. Chicken, for instance, can stay in the fridge for up to three days when properly stored and covered, or you can wrap it well and freeze it for up to two months. Regardless of the method you choose, rigorous cleanliness is crucial. Make it a habit to thoroughly clean any surfaces or utensils that come into contact with raw chicken or other proteins after brining. Cross-contamination is a significant concern, so maintaining a sanitized environment is vital for food safety.
In summary, successful brine storage and preparation hinge on understanding the basic principles of food safety. By maintaining proper temperatures, utilizing appropriate containers, disposing of unusable brine solutions, and practicing cleanliness, you can savor the benefits of deliciously flavored and moist meats while keeping food safety a priority. Whether indulging in brined chicken or exploring other brining techniques, these best practices will help ensure a safe and enjoyable culinary experience.


I’m really inspired along with your writing talents as neatly as
with the structure on your weblog. Is that this
a paid subject matter or did you modify it yourself?
Anyway stay up the excellent quality writing, it is rare to see a great weblog like this one today.
Leonardo AI x Midjourney!