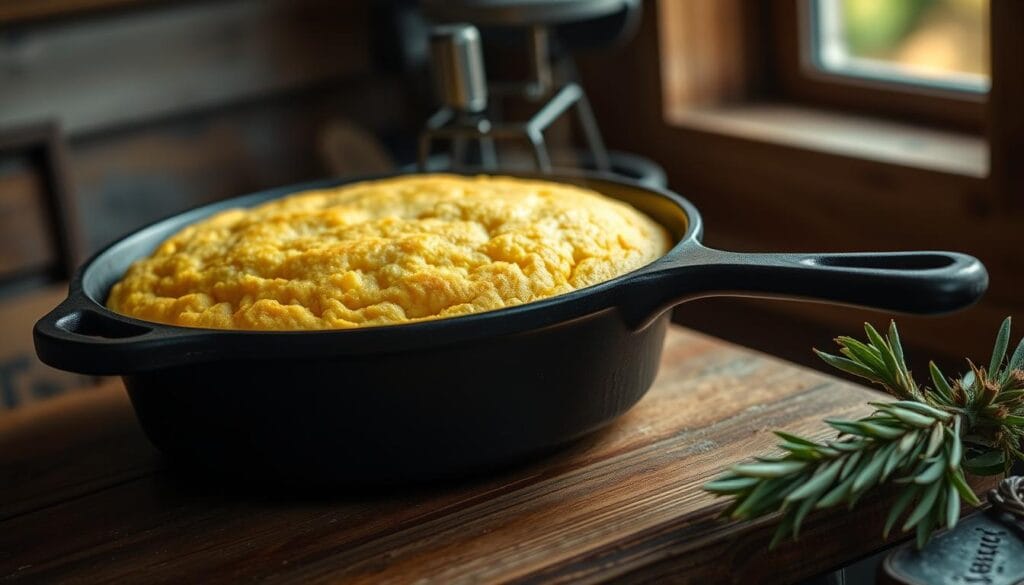
There’s something comforting about biting into a warm, cornbread muffins that tastes like home. Maybe it reminds you of Sunday dinners or cozy winter nights. Now imagine that same warmth, but with a twist: no flour needed. Whether you’re avoiding gluten or simply craving simplicity, this approach lets you savor tradition without compromise.
These golden bites rely solely on cornmeal for their base, creating a texture that’s fluffy inside with a delicate crust. You’ll need just a handful of pantry staples—no fancy equipment required. A cast iron skillet works beautifully, but a muffin tin or baking pan delivers equally delicious results. Perfect for busy weeknights or weekend gatherings.
Pair them with chili, soups, or smoky BBQ for a hearty meal. Drizzle honey for sweetness or add herbs for savory flair. The choice is yours—versatility is baked right in. And because they’re gluten-free, everyone at the table can enjoy that first warm bite.
Table of Contents
Key Takeaways
- Made with cornmeal only, eliminating the need for flour
- Bake using a cast iron skillet, muffin tin, or standard baking dish
- Pairs perfectly with chili, soups, or barbecue dishes
- Offers a moist crumb and crispy edges for balanced texture
- Naturally gluten-free, accommodating dietary restrictions
- Requires minimal ingredients for quick preparation
Introduction to a Delicious Flourless Cornbread Experience
Golden-brown edges crackle under your fingertips, revealing a tender crumb that melts on the tongue. These muffins transform humble cornmeal into something extraordinary, skipping traditional flour entirely. Their magic lies in balanced chemistry—baking soda and baking powder work together to lift the batter, creating airy pockets without gluten’s binding power.
What Makes These Muffins Special
Unlike dense, grainy alternatives, this version achieves a cake-like softness. A well-heated iron skillet or baking pan jumpstarts the rise, forming a crisp crust. The blend of acidic buttermilk and alkaline leaveners ensures consistent lift, while natural corn sweetness shines through.
Consider these advantages:
Aspect | Traditional | Flourless |
---|---|---|
Texture | Dense crumb | Light & fluffy |
Dietary Fit | Gluten-heavy | Naturally free |
Prep Time | Multiple steps | One-bowl mix |
Why Choose a Gluten-Free Option?
Gluten-free doesn’t mean flavor-free. Cornmeal’s earthy notes pair beautifully with savory or sweet toppings. Plus, you avoid processed additives common in store-bought mixes. Whether managing sensitivities or exploring cleaner eating, this approach delivers satisfaction without compromise.
Later sections will guide you through ingredient ratios, pan choices, and troubleshooting tips. Ready to bake smarter?
Ingredients Overview and Sourcing Tips
Great baking starts with quality ingredients. For this gluten-free version, every component plays a role in creating that perfect balance of crisp edges and tender crumb. Let’s explore what makes these golden bites shine.
Key Ingredients and Their Benefits
Cornmeal forms the foundation, offering a naturally grain-free texture and earthy sweetness. Opt for medium-grind varieties like Bob’s Red Mill for ideal consistency. Yogurt adds moisture—its acidity activates leavening agents for a lighter rise. Ghee or butter contributes richness, while baking soda and powder ensure airy pockets.
Optional zucchini introduces extra moisture without altering flavor. Grate it finely and squeeze out excess liquid before mixing. Need dairy-free? Swap yogurt for coconut-based alternatives and use plant-based oils instead of butter.
Substitutions for Dietary Needs
Egg-free versions thrive with chia or flax eggs—mix 1 tablespoon ground seeds with 3 tablespoons water per egg. For nut allergies, ensure all ingredients are processed in dedicated facilities. Always preheat your oven to 400°F (204°C) before baking—this jumpstarts the rise for fluffy results.
When sourcing, prioritize non-GMO cornmeal and organic dairy products. Check labels for cross-contamination warnings if gluten sensitivity is severe. With smart swaps and quality choices, everyone can enjoy these golden delights.
Essential Equipment for Baking Perfection
The right tools turn simple ingredients into golden perfection. While cornmeal-based batters are forgiving, your choice of pans and prep gear impacts texture and consistency. Let’s explore how to set up for success.
Using Your Cast Iron Skillet or Baking Pan
A seasoned cast iron skillet delivers unmatched heat retention. This creates a crispy bottom crust while keeping interiors tender. Preheat it in the oven before adding batter—this mimics traditional Southern-style results.
No skillet? Use a heavy ceramic dish or standard muffin tin. Metal pans work faster but may require shorter bake times. Check doneness 3-5 minutes earlier to prevent over-browning.
Equipment | Texture | Bake Time |
---|---|---|
Cast Iron Skillet | Crispy edges | 20-22 mins |
Ceramic Dish | Even crumb | 18-20 mins |
Muffin Tin | Portable bites | 15-17 mins |
Tools to Ensure Even Baking
Accurate measuring cups prevent dense results. Cornmeal settles quickly—spoon it into cups and level with a knife. Use wide bowls for mixing; their shape lets you fold wet and dry ingredients gently.
An oven thermometer resolves hot spots. Place it near your pan’s position to verify true temperatures. Rotate pans halfway through baking if your oven runs unevenly.
Prepping Your Ingredients for Success
Consistency begins long before your batter hits the pan. Proper preparation ensures each bite delivers the same golden crumb and airy texture. Let’s break down how to handle dry and wet components like a pro.
Measuring and Mixing Dry Ingredients
Start by sifting cornmeal into a large bowl—this prevents clumps and aerates the mix. Add baking powder, soda, and salt, then whisk for 30 seconds. The goal? Even distribution so leavening agents activate uniformly. Avoid packing the cornmeal; spoon it lightly into measuring cups for accuracy.
Preparing Wet Ingredients with Care
In a separate bowl, whisk yogurt, egg, and melted ghee until smooth. Drizzle in honey while stirring to emulsify the blend. If using zucchini, squeeze shredded pieces in a towel to remove excess moisture. Fold this into the wet mix gently—overworking creates a dense texture.
Combine wet and dry ingredients in under 2 minutes. Stir just until no dry patches remain. A few lumps are fine—they vanish during baking. Pour the batter into your prepped pan immediately to maintain lift from the leaveners.
Step-by-Step Baking Instructions
Ready to transform simple ingredients into golden perfection? Follow these precise steps to ensure your muffins rise beautifully while maintaining their signature crumb.
Preheating the Oven and Greasing the Pan
Start by heating your oven to 400°F (204°C). This high temperature creates instant lift for airy interiors. While waiting, generously coat your iron skillet or muffin tin with butter or ghee. A thin layer of fat prevents sticking and enhances browning.
For best results, place the greased pan in the oven during preheating. This mimics restaurant-style crust development. Just 5 minutes of preheating makes a noticeable difference.
Combining Ingredients Without Overmixing
Pour wet ingredients into dry components all at once. Use a silicone spatula to fold the batter in 10-12 gentle strokes. Overmixing activates excess starch, leading to dense results. A few lumps are normal—they’ll vanish during baking.
Transfer the batter immediately to your hot pan. Bake for 15-17 minutes in a muffin tin or 20 minutes in a skillet. Check doneness by inserting a toothpick—it should emerge with moist crumbs, not wet batter.
Step | Key Action | Time |
---|---|---|
Prep Pan | Grease with butter | 2 mins |
Mix Batter | Fold gently | 1 min |
Bake | Monitor crust color | 15-20 mins |
Let muffins cool for 5 minutes before serving. This rest period allows the crumb to set while preserving moisture. For extra richness, brush tops with melted butter right after baking.
Mastering the Cornbread Recipe Without Flour
Perfecting your technique unlocks the secret to airy, golden results every time. While ingredients matter, mixing methods and heat management determine whether your creation soars or sinks. Let’s explore how to balance science and simplicity for bakery-worthy texture.

Mixing Techniques to Keep the Batter Light
Treat your batter like a fragile ecosystem. Combine wet and dry ingredients in one swift motion, then fold gently with a spatula. Stop at 12 strokes—overmixing deflates the bubbles created by fresh baking powder. As one baker notes, “Lumps are your friends; they disappear in the oven.”
Baking Methods for Optimal Texture
Your choice of pan changes the game. A preheated cast iron skillet creates explosive rise and crackly edges, while muffin tins yield portable domes with softer crusts. Adjust times based on vessel depth:
Pan Type | Bake Time | Texture |
---|---|---|
Cast Iron | 18-20 mins | Crispy base |
Muffin Tin | 15-17 mins | Uniform crumb |
Ceramic Dish | 22 mins | Moist center |
Leaveners work best in high heat. Set your oven to 400°F (204°C)—this activates baking powder instantly, creating steam pockets that lift the batter. Check expiration dates on leavening agents monthly; stale powder means flat results.
Tips for Achieving a Light and Fluffy Texture
Fluffy results aren’t luck—they’re built on precise measurements and smart mixing. Mastering these techniques ensures your creation rises evenly while keeping its signature crumb. Let’s break down how to balance moisture, lift, and structure for bakery-quality outcomes.
Secrets to a Moist, Crumbly Crust
Eggs act as natural binders. Use 2 large ones for optimal structure—too few leads to dryness, while excess creates rubberiness. Combine them with buttermilk or yogurt for acidity, which activates baking soda instantly. This reaction creates air pockets before the batter even hits the oven.
Salt enhances flavor but also controls rising. Stick to ½ teaspoon per batch. Sprinkle it evenly into dry ingredients to prevent clumping. For extra crispness, brush the pan with melted butter before pouring the batter.
Avoiding Common Baking Pitfalls
Overmixing is the #1 culprit behind dense textures. Fold wet and dry ingredients in under 15 seconds. As one baker advises, “Stop when you see streaks—the oven will handle the rest.”
Expired leaveners sabotage lift. Test soda by mixing ¼ teaspoon with vinegar. If it doesn’t fizz vigorously, replace it. Always add soda last to prevent premature reactions.
Issue | Cause | Fix |
---|---|---|
Dense Texture | Overmixed batter | Fold gently, leave lumps |
Sunken Center | Expired baking soda | Test freshness pre-use |
Crumbly Crust | Insufficient egg binding | Use 2 large eggs |
Check doneness with a toothpick at the 15-minute mark. If it emerges clean but moist, pull the pan immediately. Let it cool 10 minutes—this sets the crumb without trapping steam.
Flavor Variations and Adaptability
Transform your golden bites into a canvas for creativity. The base batter adapts effortlessly to sweet, savory, or nutrient-packed twists. Whether you’re catering to allergies or exploring new flavors, small tweaks can elevate this classic while keeping its soul intact.
Incorporating Zucchini and Other Veggies
Shredded zucchini adds moisture and nutrients without overpowering the earthy corn flavor. Grate ½ cup finely, then squeeze excess water using a kitchen towel. Fold it into the bowl with wet ingredients for even distribution. Carrots or spinach work similarly—just chop finely and adjust liquid ratios slightly.
Adapting for Dairy-Free or Egg-Free Versions
Swap dairy yogurt for coconut-based alternatives to maintain tanginess. Use ¾ cup plant-based sour cream if you prefer richer texture. For egg substitutes, mix 1 tablespoon chia seeds with 3 tablespoons water per egg. Let it sit 5 minutes until gel-like. This way, you preserve structure while keeping the crumb tender.
When adding extras like herbs or cheese, measure them in cups directly from the mixing bowl to avoid cross-contamination. A pro tip: “Start with ¼ cup additions—too much can weigh down the batter.” Experiment boldly, but respect the core ratios for that iconic bread texture everyone loves.
Baking Options – Skillet, Pan, or Muffin Tin
Your choice of bakeware shapes more than just the form—it defines texture, crust, and even flavor depth. Each container interacts uniquely with heat, transforming the same batter into distinct experiences. Let’s explore how to match your tools to your culinary vision.

Choosing the Right Pan for Your Needs
A cast iron skillet delivers intense, even heat for crispy edges and a golden base. Preheat it thoroughly to mimic traditional Southern-style results. For quicker prep, use a standard baking pan—its shallow depth ensures faster cooking and a lighter crumb.
Muffin tins create portable portions with soft sides. They’re ideal for controlling portion sizes or adding mix-ins like berries. Grease each cup generously to prevent sticking, especially if your recipes include natural sugar that caramelizes during baking.
Pan Type | Texture | Best For |
---|---|---|
Cast Iron | Crispy crust | Savory pairings |
Baking Pan | Even crumb | Quick meals |
Muffin Tin | Soft edges | Portable snacks |
Adjust sugar levels based on your pan. Skillets enhance caramelization, so reduce sweeteners slightly. In muffin tins, a touch more sugar balances the faster baking time. Always grease your container with butter or oil—this ensures easy release and adds richness.
Preheat ovens to 400°F (204°C) regardless of pan choice. This jumpstarts leavening agents for consistent rise. Stick to precise measurements and timings—variations in bakeware demand attention, not guesswork.
Serving Suggestions and Pairing Ideas
These golden muffins shine brightest when paired with dishes that highlight their rustic charm. Whether you’re crafting a casual weeknight meal or hosting friends, their versatility lets you mix sweet and savory effortlessly.
Enhancing with Butter, Honey, or Syrup
Drizzle warm honey for a touch of floral sweetness or brush melted butter for richness. Maple syrup adds caramel notes, while whipped honey butter creates a decadent spread. For savory spins, try garlic-infused olive oil or chili crisp.
Consider these pairings:
- Hearty meals: Chili, smoked ribs, or black bean soup
- Light options: Garden salads or roasted vegetable medleys
- Breakfast twists: Poached eggs or avocado slices
Each muffin contains roughly 180-200 kcal, making them a balanced addition to most diets. Opt for low-sugar versions by swapping honey with mashed banana or unsweetened applesauce.
Customize your gluten free cornbread with mix-ins like shredded cheese, jalapeños, or rosemary. Crumble leftovers into stuffing or use as a base for breakfast strata. The instructions adapt easily—experiment freely while keeping portions consistent.
Nutritional Profile and Storage Options
Balancing flavor and nutrition starts with understanding what’s on your plate. Each serving of these golden bites offers a satisfying mix of energy and wholesomeness, thanks to simple, natural ingredients.
Understanding the Calorie and Fat Content
One muffin contains roughly 180 calories and 7 grams of fat. The primary source comes from yellow cornmeal, which provides complex carbs and fiber. Unlike refined flour options, this gluten-free base keeps sugar content low—just 5 grams per serving.
Nutrient | Per Serving | Daily Value* |
---|---|---|
Calories | 180 | 9% |
Fat | 7g | 11% |
Carbs | 25g | 8% |
Fiber | 2g | 7% |
Tips for Refrigerating or Freezing Leftovers
Keep leftovers fresh by cooling them completely first. Store in an airtight container at room temperature for 2 days or refrigerate for up to 5 days. For longer storage:
- Freeze: Wrap individual portions in foil. Place in freezer bags for 3 months.
- Reheat: Thaw overnight, then warm in a cast iron pan at 350°F for 5 minutes to restore crispness.
Microwave reheating works but softens the crust. Add a teaspoon of water to the container to prevent dryness. Whether fresh or frozen, these muffins stay versatile enough for any meal.
Conclusion
Crafting wholesome treats that delight everyone at the table doesn’t require complex steps or specialty flours. These golden bites prove that simplicity and flavor can coexist beautifully. By relying on cornmeal’s natural texture and smart ingredient swaps, you achieve a tender crumb that suits diverse diets.
Whether using dairy-free alternatives like coconut yogurt or egg substitutes such as chia seeds, the formula remains forgiving. Even sour cream can be swapped for plant-based versions without losing richness. The process—measuring dry ingredients, folding wet mixtures gently, and baking at high heat—ensures consistent results every time.
Feel free to experiment. Add jalapeños for spice, fold in shredded zucchini, or drizzle honey for sweetness. Each variation maintains the signature airy texture that makes these muffins so versatile.
Now it’s your turn. Preheat that oven, grab your favorite pan, and let the aroma of freshly baked goodness fill your kitchen. Share your creations online—we’d love to hear how your cornbread muffins turned out!
FAQ
Can I use a regular baking pan if I don’t own a cast iron skillet?
Why does this recipe use baking soda instead of baking powder?
How do I prevent the batter from becoming dense?
Can I make these muffins dairy-free?
What’s the best way to store leftovers?
Will adding zucchini make the muffins soggy?
How do I know when the muffins are fully baked?
Author’s Top Recipe Picks :
Gluten Free Meals: Top 15 Delicious and Celiac-Friendly Recipes
Great Gluten Free Meals: 5 Quick and Easy Weeknight Dinners