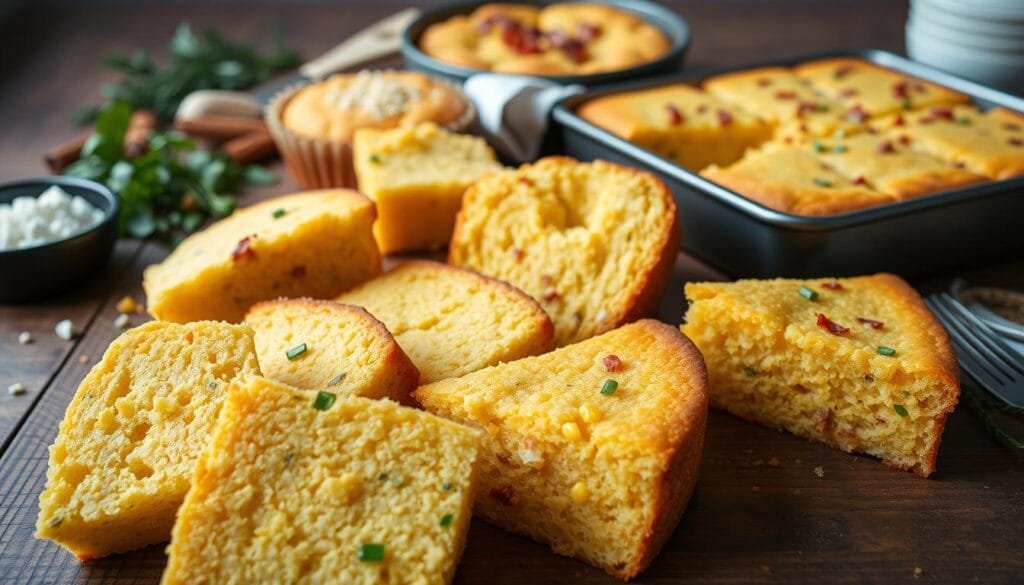
There’s something deeply comforting about a golden slice of gluten and dairy free cornbread. Maybe it reminds you of family dinners or cozy Sunday suppers. But when dietary needs change, those traditions can feel out of reach. What if you didn’t have to give up the flavors you love?
This recipe reimagines a Southern classic with a health-conscious twist. You’ll need just a handful of pantry staples—like gluten-free flour and plant-based milk—to create a moist, tender crumb. The secret? A hot cast iron skillet gives it that signature crispy edge.
No complicated steps here. Mix the batter in one bowl, pour it into your skillet, and let the oven work its magic. In under 30 minutes, you’ll have a versatile side that pairs with chili, soups, or even stands alone with a drizzle of honey.
Table of Contents
Key Takeaways
- Requires common ingredients like gluten-free flour and dairy-free butter
- Ready in under 30 minutes with minimal prep work
- Uses a cast iron skillet for optimal texture
- Maintains traditional flavor with modern substitutions
- Serves 8, perfect for family meals or leftovers
Whether you’re new to allergen-friendly baking or just craving a reliable staple, this version delivers. Keep reading to discover how simple substitutions can create big flavor—without compromising what makes cornbread special.
Introduction to a Delicious Gluten and Dairy Free Cornbread
Southern kitchens once relied on cast iron skillets and stone-ground cornmeal to create their signature breads. Today’s home cooks face new challenges but crave the same soul-warming results. This recipe bridges tradition with innovation, offering a version that’s accessible without sacrificing character.
Why This Recipe Stands Out
Unlike dense or crumbly alternatives, this version achieves a moist crumb through smart substitutions. A balanced flour blend combines fine cornmeal with binding agents to mimic wheat’s structure. Plant-based milk and oils replace dairy while keeping the rich mouthfeel you expect.
Traditional | Modern | Benefit |
---|---|---|
Wheat flour | Gluten-free mix | Gentler digestion |
Buttermilk | Vinegar + oat milk | Dairy-free tang |
White sugar | Honey or maple syrup | Natural sweetness |
Making Smart Choices Taste Better
Choosing allergen-friendly options doesn’t mean settling for less. The right ingredients—like aluminum-free baking powder and quality oils—enhance flavor depth. A hot skillet creates that crispy edge Southern cooks prize, proving equipment matters as much as technique.
Prep time stays under 10 minutes, letting you focus on meal pairings. Serve it alongside chili or smothered in jam for breakfast. With flexibility in sweetness levels and add-ins, this staple adapts to any table’s needs.
Ingredients and Essential Tools for Success
Great results start with thoughtful preparation. Gather your components and gear first—this ensures a smooth process from mixing bowl to oven. Precision matters here, but don’t worry—no fancy gadgets required.
Key Ingredients: Cornmeal, Flour Blend, and More
Use 1 cup of fine-ground cornmeal for authentic texture. Combine it with 1 cup of gluten-free flour blend containing xanthan gum. This duo mimics wheat’s structure while staying gentle on sensitive systems.
Two eggs provide lift, while ¼ cup of avocado oil keeps things moist. Need dairy-free? Swap butter for Smart Balance sticks. Sweeten with ⅓ cup coconut sugar or maple syrup. Don’t skip 1 tbsp baking powder—it’s crucial for rise.
Must-Have Kitchen Tools
A seasoned cast iron skillet creates that iconic crispy crust. No skillet? Use a 9-inch pan—just grease it well. Accurate measuring cups prevent dense results. Always spoon flour into cups instead of scooping.
Keep a sturdy whisk nearby for lump-free batter. These tools work together like a well-rehearsed team, ensuring your creation turns out tender inside with that satisfying golden crackle on top.
Prepping Your Ingredients and Workspace
A well-organized kitchen is your secret weapon for stress-free baking. Start by clearing counter space and gathering tools: measuring cups, whisks, and your trusty cast iron skillet. Lay out components in the order they’ll be used—this simple act cuts chaos and saves precious minutes.
Tip: The Spoon & Level Method for Gluten-Free Flour
Precision matters with alternative flours. Never scoop directly from the bag—this compacts the blend and leads to dense results. Instead:
- Fluff your flour blend with a fork
- Gently spoon it into your measuring cup
- Level off excess with a knife’s flat edge
This technique ensures proper ratios for that ideal cake-like texture. Even ¼ cup errors can alter your final product’s structure.
Organizing Your Ingredients for Smooth Workflow
Separate dry and wet components before mixing. In one large bowl, combine cornmeal, flour blend, sugar, and baking powder. In another, whisk eggs, oil, and plant-based milk. This division prevents premature reactions between leaveners and liquids.
Preheat your skillet while assembling ingredients—the hot pan creates that signature crispy base. Keep a timer handy to track prep time (aim for under 10 minutes). Remember: organized prep enhances flavor development and guarantees consistent results every time.
Creating the Perfect Buttermilk Substitute
Perfecting your batter starts with mastering one key component: buttermilk substitute. Traditional recipes rely on its tangy flavor to activate baking soda and tenderize crumb structure. With simple swaps, you can achieve identical results without dairy.

Milk + Acid = Magic
Combine 1 cup of almond milk (or oat milk) with 1 tablespoon of white vinegar. Stir gently in a small bowl and let sit for 5 minutes. Watch as it thickens slightly—this mimics buttermilk’s acidity for optimal rise.
Milk Type | Vinegar Ratio | Best For |
---|---|---|
Almond | 1 tbsp per cup | Neutral flavor |
Coconut | 1.5 tbsp per cup | Rich baked goods |
Oat | 1 tbsp per cup | Extra moisture |
Precision matters here. Too little acid won’t activate the baking powder fully. Too much creates an overpowering tang. Measure liquids at eye level using clear measuring cups.
If your mixture doesn’t thicken, check expiration dates on ingredients. Fresh plant-based milk works best. This step adds just 5 minutes to prep time but makes all the difference in texture.
Many professional bakers recommend this method for lactose-free recipes. Once blended into batter, the substitute behaves like traditional buttermilk—no odd aftertaste or grittiness. Experiment with different milks to find your preferred flavor profile.
How to Make Gluten and Dairy Free Cornbread: Step-by-Step Guide
Transforming basic components into a golden masterpiece requires precision and care. Follow these tested methods to craft a batter that bakes into moist, tender slices with that iconic crispy edge.
Mixing Dry and Wet Ingredients
Start by whisking 2 eggs with ⅓ cup coconut sugar in a large bowl until frothy. Add ¼ cup oil and 1 cup dairy-free buttermilk substitute, blending until silky. In another bowl, combine 1 cup flour blend (spooned & leveled), 1 cup cornmeal, and 1 tbsp baking powder.
Gradually pour wet mixture into dry components while stirring. “Fold gently—overmixing creates a dense crumb,” advises professional baker Elena Carter. Use a spatula to scrape the bowl’s sides, ensuring no dry pockets remain. The ideal batter flows slowly off your spoon but holds its shape briefly.
Techniques for a Flawless Batter
Always preheat your oven to 400°F while preparing ingredients. This ensures your skillet reaches the right temperature for that crackling crust. Let batter rest 3 minutes after mixing—this allows leaveners to activate properly.
Pour into a hot, greased skillet immediately after combining. Bake 18-22 minutes until edges pull away from the pan. Room-temperature eggs and plant-based milk blend more smoothly, preventing clumps. Remember: patience during mixing translates to airy texture in every bite.
Variations and Flavor Enhancements
Your skillet holds endless possibilities beyond the basic recipe. Adjust sweetness levels or introduce bold textures to match any meal’s personality. Let’s explore how simple tweaks transform this staple into new experiences.

Sweet vs. Savory Adjustments
Craving dessert-like warmth? Stir in 2 tbsp honey or maple syrup. For caramel notes, swap coconut sugar for brown sugar. Prefer savory? Reduce sweeteners by half and add 1 tsp smoked paprika or rosemary.
Add-In | Quantity | Effect |
---|---|---|
Fresh corn kernels | ¾ cup | Boosts moisture & crunch |
Diced jalapeños | ¼ cup | Adds mild heat |
Dairy-free cheddar | ½ cup shredded | Creates gooey pockets |
Custom Add-ins: Jalapeños, Corn Kernels, and Dairy-Free Cheese
Fold in roasted corn kernels during mixing for bursts of natural sweetness. For spicy kicks, layer sliced jalapeños on top before baking. Melt plant-based cheese into batter for rich, creamy contrasts.
Test combinations in muffin tins for portion-controlled experiments. Pro tip: Balance wet ingredients when adding mix-ins—1 extra tbsp oil prevents dryness. The base recipe’s flexibility lets you innovate while keeping that golden crust intact.
Baking Tips: Achieving a Crispy Crust and Tender Texture
Mastering the bake transforms simple batter into contrasting textures that delight the palate. Start by preheating your oven to 400°F—this creates instant heat for rising and browning. If using a cast iron skillet, place it inside while the oven warms. Hot metal jumpstarts crust formation the moment batter hits the pan.
Optimizing Oven Temperature and Baking Time
Consistent heat matters most. Set timers for 18 minutes initially, then check every 2-3 minutes. The perfect bake shows golden brown edges pulling away from the pan. Insert a toothpick into the center—it should emerge with just a few crumbs clinging.
Higher oven temps (up to 425°F) accelerate crust development. Lower temps (375°F) promote even cooking for thicker batters. Adjust based on your oven’s quirks. “Ovens lie,” warns pastry chef Marco Diaz. “Use visual cues over preset timers.”
Balance crispiness and softness by monitoring sugar content. Natural sweeteners like coconut sugar caramelize faster—reduce heat by 25°F if substituting. Let baked goods rest 10 minutes before slicing. This cooling period lets steam escape without collapsing the crumb.
If edges darken too quickly, tent foil over the pan. For undercooked centers, lower the oven rack. Track results in a baking journal—note adjustments needed for your specific equipment. Precision here ensures every batch replicates that ideal crackle-to-fluff ratio.
Storage and Leftover Ideas
Keeping your freshly baked creation at peak quality requires smart strategies. With proper techniques, you’ll enjoy that tender crumb and crispy edge for days.
Best Practices for Room Temperature and Freezer Storage
Store cooled slices in an airtight container at room temperature for up to three days. Place parchment paper between layers to prevent sticking. For longer storage, wrap individual portions tightly in plastic before freezing—they’ll stay fresh for two months.
Thaw frozen pieces overnight on your countertop. Pro tip: Label containers with dates to track freshness. Small batches freeze faster and reheat more evenly than large slabs.
Reheating Tips for Retaining Texture
Revive leftovers by warming them in a 350°F oven for 5-7 minutes. Use an oven-safe bowl to trap steam and maintain moisture. Microwave users should cover slices with a damp paper towel for 20-second bursts.
Let reheated servings rest 2 minutes before eating. This allows heat to distribute evenly, restoring that golden crust and soft interior. If edges dry out, brush lightly with plant-based butter or oil.
Remember: Storage methods directly impact flavor. Properly handled leftovers taste nearly identical to day-one batches. Experiment with timing to match your preferred texture—every oven and microwave behaves differently.
Conclusion
Reimagining classic comfort foods doesn’t mean losing what makes them special. This recipe proves simple swaps—like plant-based milk and gluten-free flour—can deliver moist crumb and crispy edges. With minimal prep time and common pantry staples, you’ll create golden slices ready in under 30 minutes.
Properly blending dry ingredients with wet components ensures ideal texture. A hot cast iron skillet works magic for that signature crust. Store leftovers using our tips to maintain freshness for days.
Feel empowered to tweak flavors—add jalapeños for heat or honey for sweetness. Every step, from mixing bowls to oven racks, has been tested for reliability. Share your creations and discover how small changes make this staple uniquely yours.
Thank you for exploring this guide. Now grab your skillet and bake with confidence—tradition and innovation belong in every bite.
FAQ
Can I use a different flour blend for this recipe?
What’s the best dairy-free milk alternative here?
Why does my cornbread crumble after baking?
Can I bake this without a cast iron skillet?
How do I store leftovers without losing moisture?
Can I add sugar for a sweeter version?
Why preheat the skillet before adding batter?
Looking to expand your healthy cooking lineup? Discover even more delicious ideas with our Gluten Free Recipes on WhatForDinner.com—perfect for every meal of the day. For tips on mastering gluten-free baking, check out this guide from King Arthur Baking Company and explore safe ingredient swaps with Celiac Disease Foundation’s gluten-free diet overview.