Ever crave the fresh, vibrant flavors of sushi but dread the prep work? Imagine transforming that beloved takeout favorite into a warm, hearty casserole you can whip up in minutes. This Easy Baked Sushi does exactly that—it’s like a cozy hug for your taste buds.
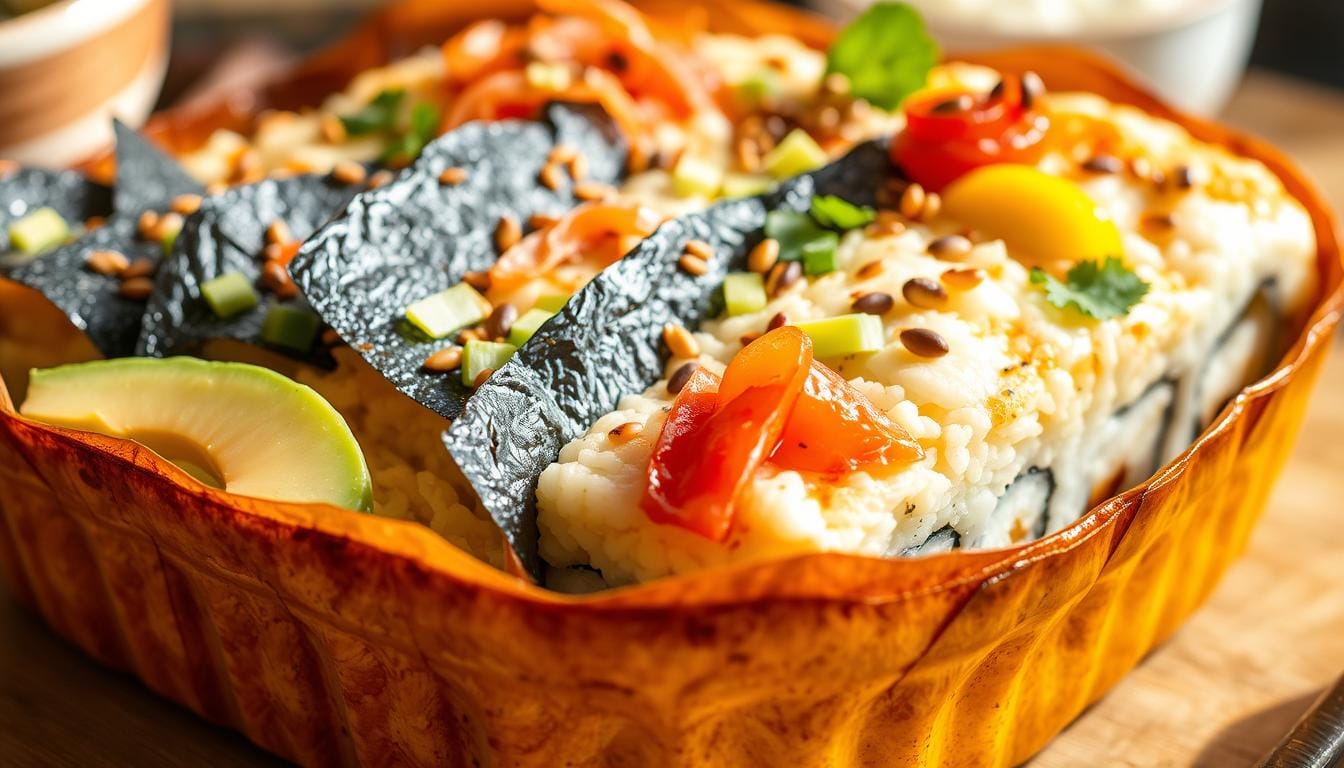
Picture layers of tangy rice seasoned with vinegar, flaky imitation crab, and a creamy topping with just the right kick. It’s a deconstructed version of classic rolls, designed for busy evenings when you want something satisfying without the fuss. No rolling mats or precision knife skills required.
What makes this dish special? It’s versatile enough for family dinners yet impressive for casual gatherings. The mix of textures—chewy grains, tender seafood, and crispy baked edges—creates a harmony that’ll keep everyone reaching for seconds. Plus, leftovers taste even better the next day!
Key Takeaways
- Combines traditional sushi flavors with a comforting casserole format
- Uses simple ingredients like seasoned rice, imitation crab, and spicy mayo
- Perfect for weeknights or last-minute entertaining
- Customizable toppings to suit personal preferences
- Delivers restaurant-quality taste in under 45 minutes
Whether you’re new to Japanese-inspired dishes or a seasoned home cook, this recipe adapts to your kitchen rhythm. It’s proof that great meals don’t need to be complicated—just packed with flavor and a dash of creativity.
Introduction to Your Sushi Bake Experience
What if you could skip the rolling mat and still savor every bite of sushi-inspired goodness? This dish reinvents classic flavors into a layered masterpiece that bakes while you prep toppings or set the table. Think of it as your kitchen’s answer to time-crunch cravings—no slicing fish or perfecting rice triangles required.
The magic starts with seasoned rice. A mix of vinegar and sugar gives it that signature tang, while a microwave speeds up cooking. Then comes the star: a creamy blend of imitation crab and spicy mayo, crowned with crunchy tempura bits or furikake. Every spoonful delivers the harmony of textures you’d find in hand-rolled maki, but with oven-baked warmth.
Why choose this recipe? It’s designed for real life. In under 30 minutes, you’ll layer ingredients in a dish and let the oven do the rest. Customize the top with avocado slices, sriracha drizzle, or pickled ginger—the options mirror your favorite roll combinations.
Food bloggers call it “deconstructed sushi meets comfort food,” and for good reason. You get all the bright flavors without the meticulous assembly. Plus, leftovers? They’re perfect for next-day lunches when reheated with a splash of water to revive the rice.
Essential Ingredients & Must-Have Tools
Gathering the right components transforms this dish from a concept to a crave-worthy reality. Whether you’re a first-timer or a seasoned cook, having precise ingredients and reliable gear ensures your creation tastes like it came straight from a sushi bar. Let’s break down what you’ll need to nail those signature flavors.
Key Ingredients: Imitation Crab, Sushi Rice, & Rice Vinegar
Start with 2 cups short-grain sushi rice—its sticky texture binds layers together. Pair it with 1/3 cup rice vinegar mixed with sugar and salt for that tangy base. Imitation crab (8 oz shredded) brings sweet, briny notes, while furikake (3 tbsp) adds crunch. Don’t skip seaweed strips for garnish—they deliver that oceanic finish.
Short-grain rice matters. Its high starch content creates the chewy foundation needed to hold toppings. Chefs call it “the glue” of sushi dishes for good reason. For best results, use seasoned rice vinegar to balance acidity without overpowering other elements.
Kitchen Tools and Equipment for Easy Sushi Prep
A fine-mesh sieve rinses rice thoroughly, removing excess starch. A rice cooker guarantees fluffy grains every time, though a pot works too. Use a 9×13 baking dish for even layering, and mix fillings in a large bowl to combine creamy mayo with crab effortlessly.
Pro tip: Keep nori sheets nearby for wrapping leftovers. They add crispness when reheated. With these tools, you’ll spend less time prepping and more time enjoying the bold, layered results.
Setting Up Your Sushi Bake: Perfect Rice Preparation
Great sushi starts with flawless rice. This step determines your dish’s texture and flavor balance. Follow these techniques to achieve grains that hold their shape while absorbing seasonings evenly.
Cleaning, Soaking, and Cooking the Sushi Rice
Rinse 2 cups sushi rice under cold water until it runs clear. Swirl grains with your fingers to remove excess starch. Drain using a fine-mesh strainer.
Soak rice in 2.5 cups water for 30 minutes. This softens the grains for even cooking. Use a rice cooker with a 1:1.25 rice-to-water ratio. Cook for 18 minutes, then let steam 10 more.
Seasoning the Rice with Vinegar, Sugar, and Salt
Mix 1/3 cup rice vinegar, 2 tbsp sugar, and 1 tsp salt in a microwave-safe bowl. Heat 30 seconds to dissolve crystals. Drizzle over warm rice.
Fold gently with a wooden spatula—don’t mash. Fan the rice while mixing to create glossy grains. Spread seasoned rice in your baking dish, pressing lightly to form an even layer.
Creating the Perfect Crab and Seafood Mixture
The heart of this dish lies in its luscious seafood blend. Start with 8 oz imitation crab (shredded) and 1/2 cup chopped shrimp tempura for contrasting textures. Combine them in a large mixing bowl with 4 oz softened cream cheese—room temperature ensures smooth integration.

Balancing Creamy & Spicy Elements
Add 1/3 cup Japanese mayo and 2 tbsp sriracha to create a velvety base. The mayo binds ingredients while the chili sauce cuts through richness. For depth, stir in 1 tsp soy sauce and 1/2 tsp sesame oil.
Mixing Techniques for Optimal Consistency
Use a rubber spatula to fold components gently. Overmixing breaks down the crab’s fibers. Taste-test for heat levels—add more sriracha if desired. Pro tip: Let the mixture rest 10 minutes before layering. This allows flavors to marry beautifully.
“The cream cheese acts as culinary glue, ensuring every bite holds together without masking the seafood’s natural sweetness.”
For variation, substitute 1/4 cup spicy mayo for regular mayo. Top with furikake or scallions before baking to enhance visual appeal. This versatile blend adapts to preferences while maintaining its signature umami punch.
Assembling and Baking Your Sushi Delight
Transform your kitchen into a sushi bar without the intricate steps by mastering the final assembly. Start by pressing seasoned rice into a greased 9×13 dish. Use damp hands to spread it evenly, creating a compact base that holds layers together.
Spoon the crab mixture over the rice, leaving a half-inch border to prevent overflow. Gently smooth it with a spatula—this ensures every bite has balanced flavors. For extra crunch, sprinkle furikake or panko on top before baking.
Preheat your oven to 375°F. This step is crucial—a hot oven creates crispy edges while melting creamy layers. Drizzle a teaspoon of oil over the dish to enhance browning. Bake uncovered for 18–20 minutes until golden.
“Always preheat thoroughly. A steady temperature prevents soggy textures,” advises Chef Mariko Yamamoto.
Switch to broil for the final 2–3 minutes to caramelize the top. Watch closely—the line between golden and burnt is thin. Let the casserole rest 5 minutes before serving. The layers fuse as it cools, making slicing cleaner.
This sushi bake emerges bubbling and fragrant, ready to scoop onto nori sheets or enjoy straight from the dish. The contrast of warm rice and crisp top mirrors traditional rolls but demands none of the precision.
Easy Baked Sushi: Tips for Success
Mastering texture separates good dishes from unforgettable ones. The secret lies in strategic layering and precise oven timing. Follow these techniques to balance creamy, crunchy, and umami elements in every bite.

Layering Techniques and Broiling for Crispy Perfection
Spread seasoned rice evenly in your dish, pressing firmly to prevent crumbling. Leave a half-inch border around the edges—this keeps the crab mixture from spilling during baking. When adding the seafood blend, use a light hand to maintain air pockets that ensure tender layers.
Broiling transforms the recipe’s final texture. After baking at 375°F for 18 minutes, switch to high broil for 90 seconds. Watch closely—the furikake topping turns golden fast. This extra time creates crackling edges that contrast with the soft base.
“Broiling is your flavor amplifier. It caramelizes sauces and unlocks new depth in toppings,” notes Chef Kenji López.
Drizzle soy-infused mayo diagonally across the surface before serving. Sprinkle toasted seaweed strips and sesame seeds for visual pop. Serve scoops in nori wraps or lettuce cups for handheld convenience—this way mimics traditional rolls without the effort.
Store leftovers in an airtight bowl for up to two days. Reheat with a damp paper towel over the oven dish to revive moisture. Add fresh garnishes each time you serve to maintain vibrant flavors.
Serving Suggestions, Customizations, and Leftover Ideas
Discover how to personalize your dish with fresh toppings and clever plating techniques. Serve warm scoops on nori sheets for handheld convenience or in crisp lettuce cups for a low-carb twist. The contrast of warm rice and cool greens creates a satisfying bite.
Enhance textures with sliced avocado, julienned cucumber, or a sprinkle of toasted sesame seeds. For heat lovers, drizzle spicy mayo or add a dash of soy sauce to the top. These garnishes mirror traditional maki flavors while letting you control each component.
- Protein swaps: Substitute imitation crab with smoked salmon or teriyaki chicken
- Sauce adjustments: Mix wasabi into mayonnaise or reduce oil for a lighter version
- Vegetarian twist: Use marinated tofu and roasted mushrooms
“Presentation elevates comfort food. Layer colors and textures to make every plate Instagram-ready.”
Store leftovers in an airtight container for up to three days. Reheat portions with a splash of water to revive the rice’s moisture. Transform day-old sushi bake into crispy patties by pan-frying them in a teaspoon of oil—perfect for bento boxes or quick snacks.
Conclusion
This deconstructed sushi casserole proves gourmet flavors thrive in everyday cooking. Fluffy seasoned rice forms the base, layered with creamy crab mixture and baked until golden. Each ingredient—from tangy vinegar to savory imitation seafood—plays a vital role in replicating authentic rolls.
Prepping takes under 30 minutes, letting your oven handle the heavy lifting. The magic happens when warm rice meets spicy sauce and crisp toppings. Customize with fresh avocado or crunchy cucumber for personalized flair.
Whether serving friends or feeding family, this dish adapts effortlessly. Swap proteins, adjust heat levels, or experiment with seasoning blends. Leftovers transform into next-day lunches when paired with nori wraps.
Ready to reinvent sushi night? This hearty casserole delivers restaurant-quality taste without the fuss. Gather your ingredients, preheat the oven, and let layers of flavor do the talking.
FAQ
Can I substitute imitation crab with real crab meat?
Do I need to soak sushi rice before cooking?
What if I don’t have rice vinegar for seasoning?
How do I prevent the crab mixture from drying out?
Can I make this dish gluten-free?
What’s the best way to layer ingredients for a crispy top?
How long do leftovers stay fresh?
Can I add raw fish like salmon or tuna to the bake?
What are some quick toppings to enhance flavor?
Looking for more clean, wholesome meals to add to your weekly lineup? After enjoying this easy salmon recipe, explore our favorite Gluten-Free Desserts for Busy Professionals to end dinner on a sweet note, or try one of these comforting Dairy-Free & Gluten-Free Soup Ideas perfect for cozy evenings. For more time-saving inspiration, don’t miss our roundup of Healthy Weeknight Meals the whole family will love. Plus, check out this helpful seafood buying guide from Seafood Watch to make informed, sustainable salmon choices.
1 thought on “Quick & Easy Baked Sushi – Perfect Weeknight Treat”
Comments are closed.