Picture this: you walk into your kitchen after a long day, craving something hearty but dreading the cleanup. What if you could whip up a meal that tastes like it simmered for hours—without the fuss? That’s the magic of this dish. It’s the kind of recipe that wraps you in warmth, like a hug from Grandma’s Smothered Chicken and Gravy.
With just one pan and 35 minutes, you’ll create a Southern classic that’s equal parts nostalgic and practical. Imagine golden-brown pieces sizzling in rich gravy, filling your home with those inviting smells that make everyone gather around the table. No fancy techniques or endless steps—just straightforward comfort.
Busy weeknights don’t stand a chance here. You’ll spend less time cooking and more time savoring. Plus, minimal cleanup means you can relax instead of scrubbing pots. This isn’t just dinner—it’s a reminder that good food doesn’t need to be complicated.
Key Takeaways
- Cook a Southern favorite in one pan for easy cleanup.
- Ready in 35 minutes—perfect for busy schedules.
- Balances rich, nostalgic flavors with modern simplicity.
- Ideal for weeknights or impressing weekend guests.
- Uses basic ingredients to create a hearty, satisfying meal.
Introduction to This Classic Comfort Food Recipe
Ever wonder why some meals feel like a warm blanket for your soul? This dish answers that question with every bite. Rooted in Southern kitchens, it’s built on layers of flavor that turn simple ingredients into something extraordinary. Think golden-crusted poultry simmering in velvety sauce—each forkful delivers nostalgia and satisfaction.
The secret lies in the gravy. Slow-cooked richness blends with herbs, creating a savory cloak that tenderizes the meat. Comfort food like this isn’t just about taste—it’s about memories. Generations have gathered around tables where this recipe starred, its aroma promising warmth and connection.
What makes it perfect for hectic nights? One skillet does it all. Sear, simmer, and serve without juggling multiple pans. While the gravy bubbles, you’ll catch hints of thyme and onion mingling in the air—a scent that turns a meal into an experience.
Southern tradition meets modern practicality here. Originally born from resourcefulness, this dish now fits seamlessly into today’s fast-paced lives. Whether you’re feeding a family or craving a taste of home, it proves that hearty food doesn’t need hours—or a mountain of dishes—to hit the spot.
Essential Ingredients for Smothered Chicken and Gravy
Gathering the right components transforms simple items into a memorable dish. Let’s break down what you’ll need to create this soul-warming meal. Each element plays a specific role in building layers of flavor and texture.
Start with bone-in poultry pieces—they stay juicier during cooking. All-purpose flour forms the base of your gravy, thickening it to velvety perfection. Fresh garlic and diced onion add aromatic depth, while low-sodium broth lets you control salt levels.
| Ingredient | Purpose | Pro Tip |
|---|---|---|
| Flour | Thickens gravy | Measure precisely for ideal consistency |
| Garlic | Adds earthy aroma | Use fresh cloves, not pre-minced |
| Onion | Builds savory base | Yellow varieties work best |
| Salt | Enhances flavors | Add gradually, taste as you go |
Quality seasonings make a noticeable difference. Choose smoked paprika over regular for subtle complexity. Fresh thyme leaves beat dried versions in flavor intensity. Always measure flour and salt accurately—too much creates lumpy gravy, while too little leaves it watery.
Set everything within reach before heating your pan. This mise en place approach prevents rushed measurements and ensures smooth cooking. With these essentials prepped, you’re ready to craft a meal that tastes like Sunday supper but cooks like a weeknight hero.
Prepping Your Chicken
Proper preparation transforms basic ingredients into a standout dish. Follow these steps to lock in moisture and create that crave-worthy golden crust.
Seasoning and Marinating Techniques
Start by patting breasts dry with paper towels. Mix 1 tbsp olive oil with 2 tsp poultry seasonings in a bowl. Add chicken, turning until fully coated. Let it rest 10 minutes—this helps flavors penetrate.
Breading and Dredging Tips
Combine 1 cup flour with ½ tsp each garlic powder and paprika. Press each piece firmly into the mixture, shaking off excess. Set aside coated breasts on a rack for 5 minutes. This resting period helps the coating adhere during cooking.
| Step | Purpose | Key Tool |
|---|---|---|
| Marinating | Enhances flavor depth | Mixing bowl |
| Dredging | Creates crispy texture | Shallow dish |
| Resting | Improves coating adhesion | Wire rack |
For even coverage, use one hand for wet ingredients and the other for dry. Always set aside excess flour—reusing it can create clumpy breading. Proper technique ensures every bite delivers maximum crunch and flavor.
One-Pan Cooking Process Explained
What separates good meals from unforgettable ones? It’s the caramelized crust that forms when proteins meet proper heat. This technique transforms your skillet into a flavor factory, building layers that elevate every bite.
Browning the Chicken for Maximum Flavor
Heat 2 tbsp oil in your skillet over medium-high until it shimmers. Place seasoned pieces in the pan—they should sizzle immediately. Resist moving them for 4 minutes. This creates a golden crust that locks in juices while creating crispy edges.
Building the Flavorful Fond
Those dark bits stuck to the bottom pan? That’s liquid gold. After removing the meat, reduce heat to medium. Add sliced onions and scrape vigorously with a wooden spoon. The fond dissolves into the oil, creating a rich base for your gravy.
| Step | Key Action | Time |
|---|---|---|
| Searing | Develop crust | 4-5 mins/side |
| Fond Creation | Deglaze pan | 2-3 mins |
Timing matters most here. Cook minutes precisely—overcrowding the pan drops the temperature, leading to steamed instead of seared results. A well-executed sear provides the foundation for your entire dish’s depth.
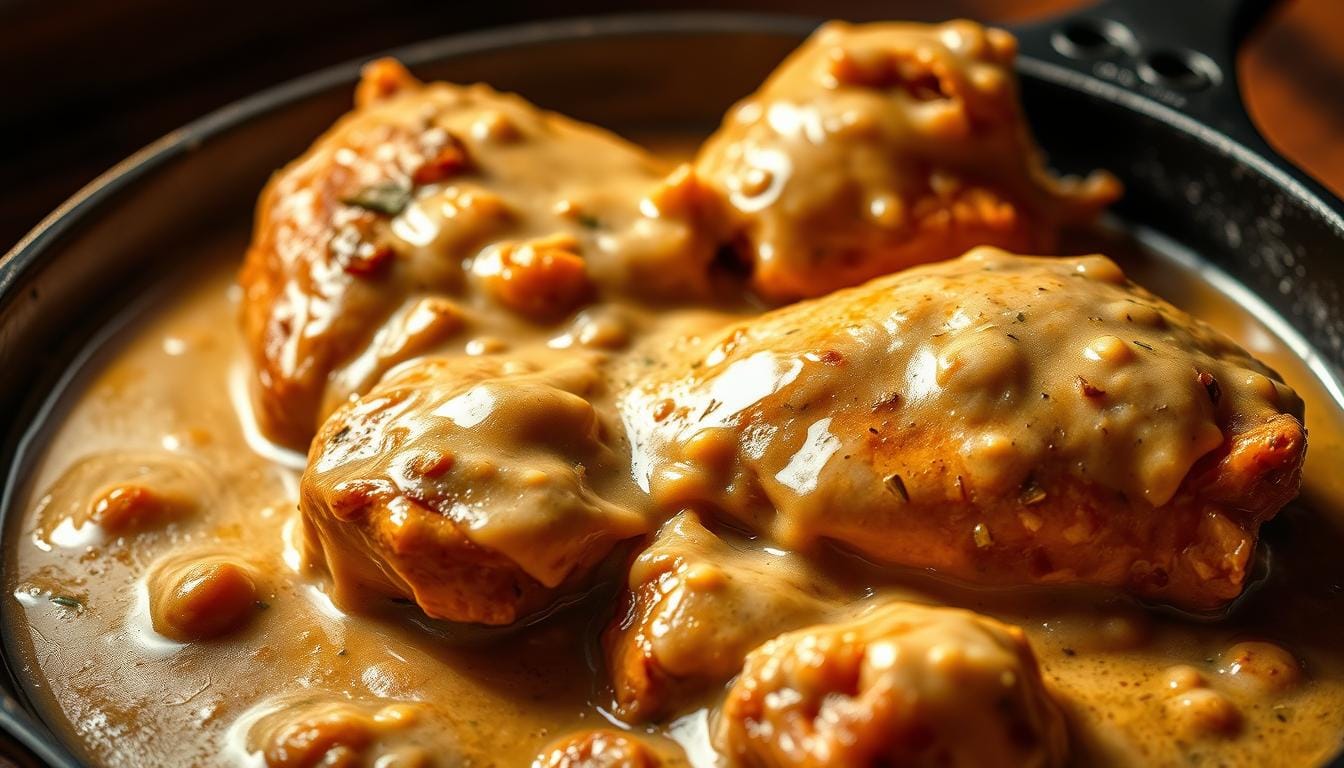
Mastering Smothered Chicken and Gravy
The moment golden poultry meets simmering sauce transforms your kitchen into a five-star bistro. Return seared pieces to the pan after building your gravy base—they should nestle into the liquid like puzzle pieces. Medium-low heat works best here, allowing flavors to merge without overcooking.
Set a timer for 15 minutes. This gives the meat time to absorb savory notes while staying juicy. “The magic happens when steam lifts seasonings into every fiber,” says Chef Marla Johnson. Stir occasionally to prevent sticking, but avoid disrupting the crust you worked hard to create.
Use a meat thermometer for precision. Target 165°F internally—this ensures safety without dryness. If gravy thickens too quickly, add broth one tablespoon at a time. Perfect consistency coats the back of a spoon but still flows smoothly.
| Step | Tool | Tip |
|---|---|---|
| Simmering | Lid | Partial cover retains moisture |
| Testing | Thermometer | Insert into thickest section |
Weeknight warriors rejoice: this technique requires no special skills. Just patience and attention. When time’s up, you’ll lift the lid to find tender protein swimming in velvety sauce—a hug on a plate that proves comfort food conquers chaos.
Savory Homemade Gravy: Step-By-Step Guide
The alchemy of great gravy starts with patience and a hot pan. After searing your protein, lower the heat to medium. Those caramelized bits in the skillet? They’re flavor gold waiting to transform your sauce.

Pour 1 cup of broth into the pan, scraping vigorously with a wooden spoon. Watch the fond dissolve into liquid magic. Sprinkle ¼ cup flour evenly across the surface, whisking constantly to create a smooth roux. “The key is gradual incorporation—no rushing this dance,” advises Chef Lorraine Hayes.
| Step | Tool | Key Action |
|---|---|---|
| Deglaze Pan | Wooden Spoon | Scrape all browned bits |
| Thicken Sauce | Whisk | Incorporate flour slowly |
| Simmer | Measuring Cup | Add broth in stages |
Gradually stream in remaining broth while whisking. The mixture will thicken as it bubbles—aim for a consistency that coats your spoon. Set aside any excess flour; you can adjust thickness later if needed.
After 5 minutes of simmering, nestle your seared pieces back into the pan. Let them bathe in the sauce for 3-4 minutes, absorbing its richness. Stir in reserved onion bits for texture. Your gravy should now cling to every surface, creating that signature velvety finish.
Remember: perfect gravy balances time and technique. Too thin? Mix 1 tsp flour with cold water and whisk in. Too thick? Splash in more broth. This versatile sauce adapts to become exactly what your meal needs.
Serving Suggestions & Complementary Sides
The right accompaniments can turn a great dish into an unforgettable feast. Southern cuisine thrives on balance—rich flavors need bright contrasts and textural companions. Let’s explore pairings that honor tradition while letting your creativity shine.
Mashed Potatoes, Rice & More
Buttery mashed potatoes act like edible velvet for your gravy. For a lighter twist, try garlic-infused cauliflower mash. Fluffy white rice soaks up sauces beautifully, while wild rice adds nutty complexity.
Crunchy green beans sautéed with almonds bring freshness to the plate. Consider these quick-prep sides:
| Side Dish | Prep Time | Flavor Profile |
|---|---|---|
| Cheddar Biscuits | 15 minutes | Savory & Cheesy |
| Collard Greens | 20 minutes | Smoky & Tangy |
| Sweet Cornbread | 25 minutes | Buttery & Slightly Sweet |
Garnish with chopped parsley or chives for color contrast. “A sprig of thyme or dash of paprika makes plates Instagram-ready,” notes food stylist Tina Marlow.
Seasonal flexibility keeps meals exciting. Swap steamed veggies for roasted root potatoes in winter. Summer calls for crisp cucumber salads or grilled zucchini. Most recipes here take under 30 minutes—perfect for busy nights.
Remember: these are guidelines, not rules. Love spicy flavors? Add pickled jalapeños to your rice. Prefer crunch? Toasted breadcrumbs elevate mashed potatoes. Your table, your masterpiece.
Tools and Techniques for One-Pan Cooking

Your skillet becomes a flavor factory when paired with the right gear. Start with a cast iron skillet—its even heat distribution prevents hot spots that burn delicate sauces. Sturdy tongs and a flat-edged spatula let you flip pieces effortlessly while scraping up those crispy browned bits.
Mastering medium heat makes all the difference. Too high? You’ll char the exterior before the interior cooks. Too low? Food steams instead of searing. Aim for oil that shimmers but doesn’t smoke when you add chicken to the pan.
| Tool | Purpose |
|---|---|
| Liquid Measuring Cup | Ensures precise broth ratios |
| Meat Thermometer | Guarantees safe internal temps |
| Wooden Spoon | Scrapes fond without scratching |
Use oils with high smoke points like avocado or refined vegetable. Measure flour by spooning it into a cup and leveling—packed flour creates lumpy gravy. “Proper tools turn stressful cooking into rhythmic precision,” notes kitchen expert Carla Simmons.
- Scrape the skillet base constantly while building gravy
- Let oil heat 1 minute before adding ingredients
- Keep a towel nearby to wipe spills instantly
New cooks can nail this recipe by focusing on two skills: temperature control and patience. Let the pan work its magic—no constant flipping or stirring. With these techniques, you’ll transform basic ingredients into restaurant-worthy meals using just one trusted skillet.
Expert Tips & Troubleshooting for Perfect Results
Ever faced a gravy that’s too thin or too thick? You’re not alone. These kitchen-tested strategies help you tweak textures and flavors like a pro. Mastery comes from understanding how small adjustments create big changes.
Adjusting Consistency and Enhancing Flavor
Control your sauce’s thickness with heat management. For thicker gravy, simmer uncovered 2-3 extra minutes—evaporation concentrates flavors. Too dense? Stir in broth one tablespoon at a time until it flows smoothly off your spoon.
| Issue | Solution | Result |
|---|---|---|
| Watery Sauce | Mix 1 tsp flour with cold water, whisk in | Silky texture |
| Overly Thick | Add warm broth gradually | Perfect pour |
Boost depth with onion powder—its concentrated savoriness enhances without adding moisture. A pinch of cayenne pepper (⅛ tsp) introduces warmth without overwhelming heat. Always taste before serving—sometimes an extra sprinkle of salt bridges flavors.
Medium heat proves crucial throughout. High temps burn fond; low temps prevent browning. Maintain steady bubbles in your pan when simmering—this ensures even thickening. If using garlic, add it late to avoid bitterness.
Remember: seasoning builds in layers. Start light, adjust after simmering. Keep black pepper handy for last-minute brightness. Your taste buds guide final tweaks better than any recipe.
Conclusion
You’ve just mastered the art of turning simple ingredients into a soul-satisfying feast. From seasoning chicken thighs to deglazing that trusty cast iron skillet, every step builds toward golden-crusted perfection. Remember: precise measurements for flour and a watchful eye on simmering time make all the difference.
Swap pork chops or breasts to customize this dish. Struggling with gravy texture? Adjust with broth or a flour slurry. Share your twist using smoky paprika or a dash of cayenne pepper for heat—your kitchen, your rules.
Pair your creation with fluffy mashed potatoes or buttery rice. This recipe proves comfort food doesn’t demand hours. One pan. Thirty-five minutes. A flavor-packed meal that feels like home.
Ready to claim your spot as the weeknight hero? Whip up this classic, snap a photo, and tag #SouthernComfortEats. Your next comfort-filled dinner awaits.
FAQ
Can I substitute boneless thighs for breasts in this recipe?
How do I prevent the flour from clumping in the gravy?
What’s the best way to enhance the savory depth of the gravy?
Can I prepare this dish ahead of time?
What sides pair well with this meal besides mashed potatoes?
How do I fix gravy that’s too thin or too thick?
Can I use a nonstick pan instead of stainless steel?
Is there a gluten-free alternative for the flour coating?
External Resources for Best Results:
- USDA Chicken Breast Nutrition: https://fdc.nal.usda.gov/fdc-app.html#/food-details/171705/nutrients
- National Cancer Institute on Broccoli Benefits: https://www.cancer.gov/about-cancer/causes-prevention/risk/diet/cruciferous-vegetables-fact-sheet
- Safe Grilling Tips: https://www.fsis.usda.gov/food-safety/safe-food-handling-and-preparation/grilling-safety
Looking to explore more healthy chicken bowls, low-carb chicken recipes, or broccoli recipes for dinner? Head over to www.whatfordinner.com for expert-crafted, nutrition-focused meal ideas.
dzt29l
4u1c30
mpur6k
ct3kv2
q3xmer
l2b0yo
I got good info from your blog
I am not sure the place you’re getting your information, however great topic. I needs to spend some time learning much more or understanding more. Thanks for magnificent information I was in search of this info for my mission.
Wow, superb blog structure! How long have you ever been blogging for? you made running a blog glance easy. The whole glance of your website is magnificent, let alone the content!
Hmm it seems like your site ate my first comment (it was super long) so I guess I’ll just sum it up what I wrote and say, I’m thoroughly enjoying your blog. I as well am an aspiring blog writer but I’m still new to the whole thing. Do you have any suggestions for rookie blog writers? I’d certainly appreciate it.
Excellent read, I just passed this onto a friend who was doing a little research on that. And he actually bought me lunch as I found it for him smile Therefore let me rephrase that: Thanks for lunch!
0rxho3
I love your blog.. very nice colors & theme. Did you make this website yourself or did you hire someone to do it for you? Plz respond as I’m looking to construct my own blog and would like to find out where u got this from. thanks a lot
What¦s Going down i’m new to this, I stumbled upon this I have discovered It absolutely helpful and it has helped me out loads. I’m hoping to contribute & help other users like its helped me. Great job.
**mindvault**
mindvault is a premium cognitive support formula created for adults 45+. It’s thoughtfully designed to help maintain clear thinking
Hello, Neat post. There is a problem with your website in internet explorer, may test thisK IE nonetheless is the marketplace chief and a huge section of other people will pass over your excellent writing because of this problem.
c4ofat
Good ?V I should certainly pronounce, impressed with your website. I had no trouble navigating through all the tabs and related info ended up being truly simple to do to access. I recently found what I hoped for before you know it at all. Quite unusual. Is likely to appreciate it for those who add forums or anything, web site theme . a tones way for your client to communicate. Nice task..
Hi this is somewhat of off topic but I was wanting to know if blogs use WYSIWYG editors or if you have to manually code with HTML. I’m starting a blog soon but have no coding knowledge so I wanted to get guidance from someone with experience. Any help would be greatly appreciated!
Appreciating the commitment you put into your website and detailed information you provide. It’s great to come across a blog every once in a while that isn’t the same unwanted rehashed material. Great read! I’ve bookmarked your site and I’m adding your RSS feeds to my Google account.
Only wanna input on few general things, The website style and design is perfect, the subject matter is rattling wonderful. “Drop the question what tomorrow may bring, and count as profit every day that fate allows you.” by Horace.
hey there and thanks in your info – I have definitely picked up anything new from right here. I did however experience several technical points the use of this website, since I skilled to reload the website lots of times prior to I may get it to load correctly. I were brooding about in case your web hosting is OK? No longer that I am complaining, but slow loading instances occasions will sometimes impact your placement in google and could injury your high quality score if ads and ***********|advertising|advertising|advertising and *********** with Adwords. Anyway I’m including this RSS to my email and could glance out for a lot more of your respective fascinating content. Ensure that you update this once more very soon..
My programmer is trying to convince me to move to .net from PHP. I have always disliked the idea because of the expenses. But he’s tryiong none the less. I’ve been using Movable-type on a number of websites for about a year and am anxious about switching to another platform. I have heard great things about blogengine.net. Is there a way I can transfer all my wordpress content into it? Any kind of help would be really appreciated!