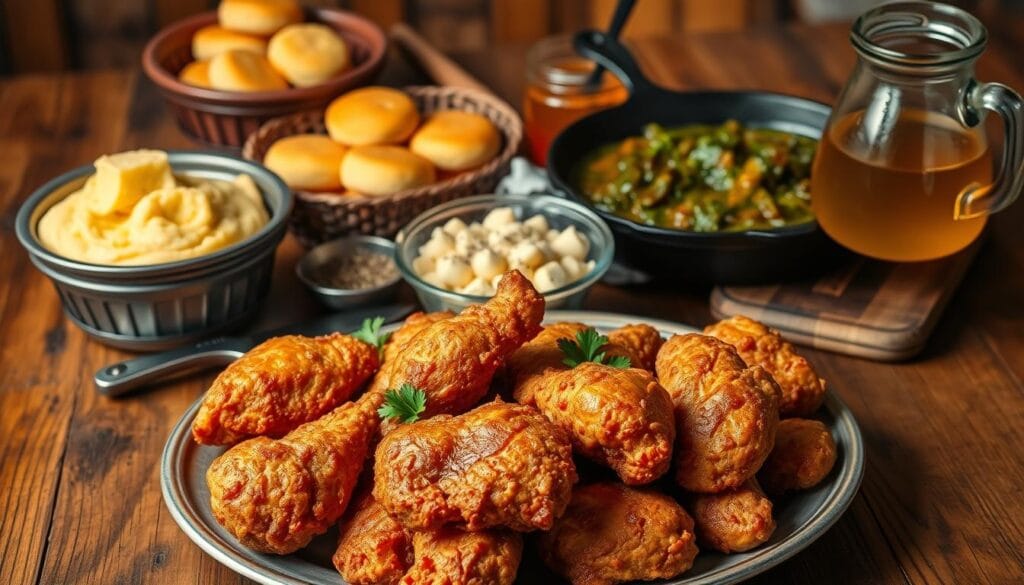
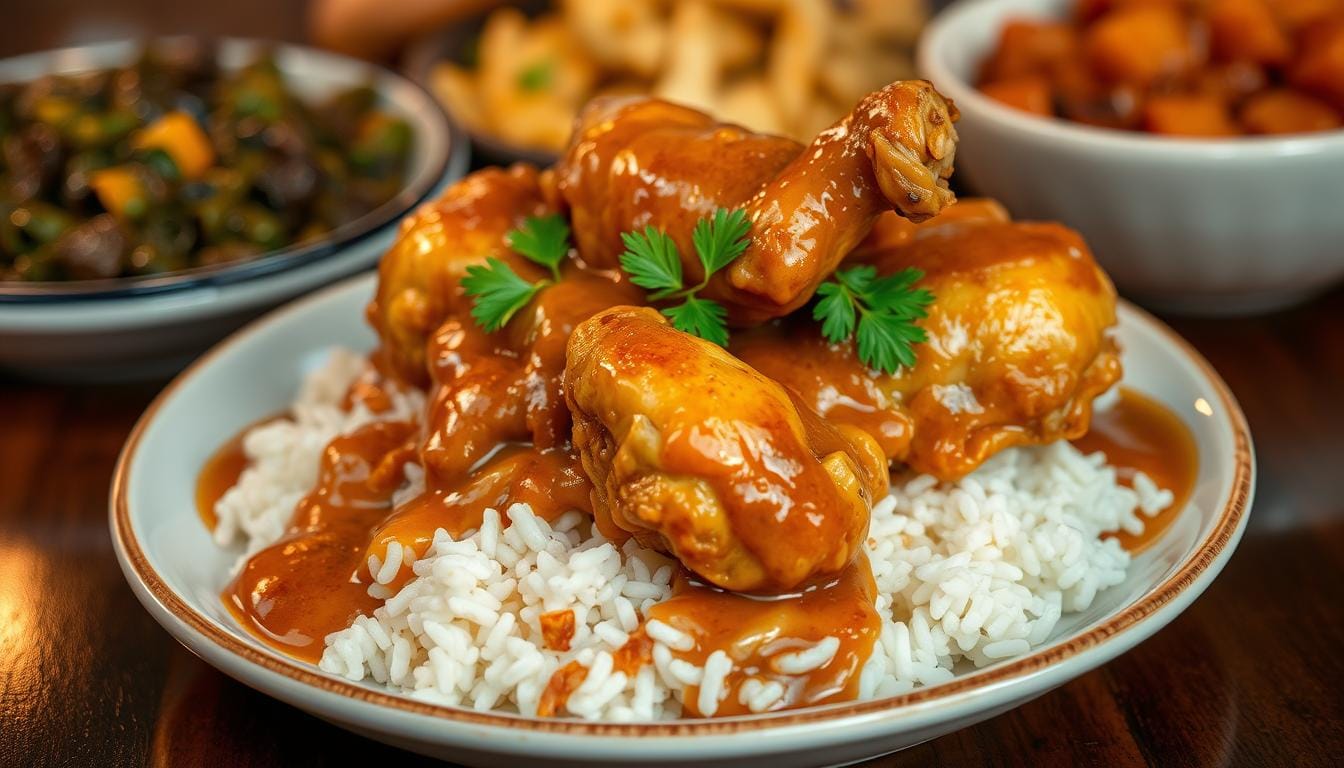
Soul Food Smothered Chicken That Serves 6 – Southern Flavor in Every Bite

There’s something magical about a meal that feels like a warm hug. Maybe it’s the aroma of golden-brown tender pieces simmering in a rich, velvety gravy. Or the way every bite takes you back to lazy Sunday afternoons spent around a crowded table. This isn’t just dinner—it’s a celebration of heritage.

Southern cooking thrives on simplicity and heart. The dish we’re sharing today serves six, making it perfect for family gatherings or meal prep. It balances crispy edges with melt-in-your-mouth texture, all coated in a homemade sauce that’s creamy without being heavy. Every spoonful whispers stories of generations past.

Think of golden cast-iron skillets passed down through kitchens, or the laughter echoing over heaping plates. This recipe isn’t just about ingredients—it’s about connection. Whether you’re new to this style of cooking or grew up with it, we’ll guide you step-by-step to recreate that authentic taste.

Key Takeaways

  • Perfect for feeding a group of six with hearty, satisfying portions.
  • Rooted in Southern tradition, emphasizing bold flavors and slow-cooked comfort.
  • Features crispy protein paired with a from-scratch gravy that’s both creamy and savory.
  • Celebrates the communal spirit of shared meals and family recipes.
  • Includes practical tips for achieving the ideal texture and depth of flavor.

Embracing Southern Soul Food Tradition

Every bite of this dish carries centuries of tradition, blending resourcefulness with rich flavors. Generations perfected techniques that transformed simple ingredients into cherished meals. At its core lies a balance of texture and taste—crispy edges hugging tender meat, all swimming in savory sauces.

A Brief History of Southern Comfort Food

Early Southern cooks made magic with what they had. Staples like flour and garlic powder became tools for creating depth. Cast-iron skillets ensured even heat distribution, while slow cooking tenderized tougher cuts.

Smothered dishes emerged as a way to stretch proteins. The method locked in moisture and flavor. Today’s versions honor that ingenuity, using fresh onions and homemade gravy to build complexity.

What Makes This Recipe a True Classic

Three elements define authenticity here. First, the golden crust from seasoned flour. Second, the aromatic base of caramelized onions. Finally, the velvety gravy that ties everything together.

Traditional ElementsModern AdaptationsCultural Impact
Cast-iron cookingElectric skilletsFamily gatherings
Fresh herbsPre-made spicesCommunity events
Hand-milled flourStore-bought blendsShared recipes

This dish thrives at potlucks and Sunday dinners alike. It’s not just about feeding bodies—it’s about nourishing connections. When you take that first forkful, you’re tasting history.

The Story Behind This Recipe

It all began with a handwritten note tucked inside an old cookbook, its edges stained with decades of love. My great-grandmother scribbled the first version during the 1930s, using ingredients she could grow or barter. “You’ll need a heavy skillet and 12 minutes of courage,” she’d joke about the initial searing step. Her playful tone hid generations of kitchen wisdom.

The magic starts with garlic sizzling alongside onions—a fragrant base that transforms the dish. You’ll notice how these aromatics bloom in hot oil, releasing earthy sweetness into every crevice. “That’s where the flavor lives,” my aunt once said, stirring the golden mixture with a wooden spoon.

Her skillet, seasoned by decades of use, became the recipe’s unsung hero. Cast iron retains heat evenly, creating those coveted crispy edges while keeping meat tender. Modern pans work, but nothing replicates the depth of a well-loved piece.

Black pepper plays a quiet but vital role here. A generous grind cuts through richness without overpowering. It’s the bridge between bold spices and subtle herbs—proof that balance makes comfort food unforgettable.

What surprises most? How quickly it comes together. After browning, the dish simmers unattended, giving you time to set the table or call loved ones. In under an hour, you’re serving a meal steeped in history yet simple enough for Tuesday nights.

Preparing for Your Cooking Adventure

Great meals begin with smart prep work. Before turning on the stove, take time to organize your space and ingredients. This ensures smooth execution and lets you focus on building flavors.

Gathering Your Ingredients

Start with pantry staples: flour, salt, and your favorite spice blends. Fresh aromatics like garlic and onions add depth, while quality oil ensures proper browning. Pre-measure powder seasonings to maintain balance—too much can overpower the dish.

Keep proteins at room temperature for even cooking. Pat them dry with paper towels to help the crust form. This simple step prevents steaming and promotes that golden texture everyone loves.

Essential Kitchen Tools and Setup

A seasoned cast iron skillet is non-negotiable. Its heat retention creates perfect searing temperatures. Pair it with sturdy tongs for flipping and a heavy whisk for smoothing gravy.

Manage heat carefully: medium-high for browning, lower temps for simmering. Use oils with high smoke points like peanut or avocado. They handle intense heat without burning, letting you achieve crisp edges safely.

Organize mixing bowls and measuring spoons within reach. Clean as you go—it keeps your workspace functional and reduces stress. With everything in place, you’re ready to cook with confidence.

Breaking Down the Ingredients

Every great dish starts with quality components working in harmony. Let’s explore what makes this recipe sing—from foundational elements to flavor boosters.

Southern smothered dish ingredients

Protein choices matter. Bone-in, skin-on thighs and drumsticks reign supreme here. Their higher fat content keeps meat juicy during slow cooking while creating crispy skin. Always pat pieces dry before seasoning—moisture is the enemy of golden crusts.

Onions transform as they cook. Thinly sliced rings caramelize into sweet, amber strands that melt into the gravy. This natural sweetness balances savory spices, creating complex flavor layers without added sugar.

IngredientPurposeSelection Tip
PaprikaAdds color & smoky depthChoose bright red powder without clumps
Fresh GarlicEnhances aromatic baseFirm bulbs with tight skins
All-Purpose FlourCreates crust & thickens gravyUnbleached varieties work best

The spice blend does heavy lifting. Paprika brings warmth, while black pepper adds subtle heat. Garlic powder merges with fresh cloves for layered savoriness. Always taste your seasonings first—stale spices ruin balance.

Pro tip: Buy whole yellow onions instead of pre-chopped. Their tighter layers hold juices better during slicing. For peak flavor, use spices within six months of opening.

Step-by-Step Instructions for Making Soul Food Smothered Chicken

The secret to perfect Southern comfort lies in technique, not just ingredients. Timing transforms simple elements into something extraordinary. Let’s walk through each stage to build layers of flavor while keeping meat juicy and gravy velvety.

Prepping and Seasoning the Chicken

Start with dry protein. Pat pieces dry with paper towels—moisture ruins the crust. Mix 1 cup flour with 2 tsp garlic powder, 1 tsp paprika, and ½ tsp black pepper in a shallow dish. Dredge each piece thoroughly, shaking off excess. Pro tip: Let coated meat rest 5 minutes. This helps the coating adhere during cooking.

Browning and Creating a Rich Gravy

Heat ¼ cup oil in a cast-iron skillet over medium-high. Arrange pieces skin-side down without crowding. Cook 6-8 minutes per side until golden brown. Remove meat, leaving 3 tbsp oil. Add 2 sliced onions and 4 minced garlic cloves. Sauté 4 minutes until fragrant.

“That sizzle when onions hit hot oil? That’s your flavor foundation.”

Sprinkle 3 tbsp flour into the skillet. Whisk 2 minutes to create a nutty roux. Gradually pour in 3 cups broth, scraping browned bits. Return meat to the pan. Simmer covered 35 minutes, then uncover for 10 minutes to thicken. Gravy should coat the back of a spoon.

StepTimeKey Action
Coating5 minEven flour coverage
Browning14 minCrisp exterior
Simmering45 minTender interior

Monitor heat closely—too high burns the gravy, too low prevents thickening. Serve immediately over mashed potatoes or rice to soak up every drop.

Essential Tips for Achieving Crispy, Golden Perfection

Crispy edges and tender meat don’t happen by accident—they’re science meets Southern know-how. Balancing heat, timing, and technique transforms ordinary ingredients into comfort food mastery. Let’s break down the methods that guarantee success every time.

Mastering the Art of Seasoning

Precision matters when building flavor layers. Use a dry cup measure for flour to ensure consistent coating thickness. For bone-in breasts or thighs, rub spices under the skin to lock in moisture. Always taste your seasoning mix before dredging—adjust if needed.

Combine 1 tablespoon paprika with 2 teaspoons garlic powder per cup of flour. This ratio creates depth without overwhelming delicate flavors. Let seasoned pieces rest 10 minutes before cooking—this helps spices adhere during high-heat searing.

Perfecting Browning and Deglazing Techniques

Heat control makes or breaks your crust. Use an oil with high smoke point, and wait until it shimmers before adding meat. Crowding the pan steams instead of sears—work in batches if needed. After browning, deglaze with broth using a wooden spoon to scrape up flavorful bits.

CutBrowning TimeMoisture Retention
Thighs7-8 mins/sideHigh
Breasts5-6 mins/sideMedium
Drumsticks6-7 mins/sideHigh

Pair your creation with buttery mashed potatoes to soak up every drop of gravy. The starch balances textures while enhancing that comfort food satisfaction. Remember: golden perfection comes from patience, not rushed heat.

Variations and Customizations to Suit Your Taste

Your kitchen, your rules. This dish thrives on adaptability, letting you tweak elements while keeping its comforting core. Swap cuts, adjust flavors, or streamline prep—each choice makes the recipe uniquely yours.

Adapting With Different Chicken Cuts

Drumsticks and wings work beautifully here. Their higher skin-to-meat ratio creates extra crispy surfaces. For leaner options, try boneless thighs—reduce simmer time by 10 minutes to prevent dryness. Turkey legs? Double the broth cups and cook 20% longer for fall-off-the-bone tenderness.

Experimenting With Seasonings and Herbs

Swap paprika for smoked chipotle powder to add heat. Fresh thyme or rosemary infuses earthy notes during simmering. Prefer citrus undertones? Zest a lemon into the flour coating. “Spice blends should tell your story,” says Chef Marla Carter. Start with 1 tsp adjustments, tasting as you go.

Gravy ThicknessBroth AdjustmentCooking Time
ThickerReduce by ½ cup+5 mins simmer
ThinnerAdd ¾ cup-3 mins simmer

Prep onions and spice mixes up to 3 days ahead. Store them separately in airtight containers. Come meal time, you’ll have 20 minutes back for setting the table or tossing a fresh side salad.

Pair your creation with classic side dishes like collard greens or cornbread. The beauty lies in balance—rich proteins need bright, acidic companions. Leftovers? They’ll taste even better tomorrow as flavors deepen overnight.

Serving Suggestions for a Complete Southern Meal

A well-crafted Southern meal is more than food—it’s a visual and flavorful celebration. Pairing your main dish with thoughtful sides and artful plating elevates the experience from ordinary to unforgettable. Let’s explore how to create harmony on the plate while honoring tradition.

Southern meal presentation

Ideal Sides to Complement Your Dish

Balance rich flavors with fresh, vibrant accompaniments. Creamy mashed potatoes soak up savory gravy, while collard greens add earthy contrast. Golden cornbread brings subtle sweetness that cuts through richness. For lighter options, try steamed green beans or a tangy cucumber salad.

Side DishFlavor RolePrep Tip
Buttermilk BiscuitsButtery textureBake fresh
Cheesy GritsCreamy baseStir constantly
Pickled OkraAcidic crunchChill before serving

Plating and Presentation Tips

Use wide, shallow bowls to showcase saucy portions. Place a ladle of gravy over golden-brown pieces just before serving—this keeps the crust crisp. Garnish with a sprinkle of freshly ground black pepper and parsley sprigs for color contrast.

“Plating is the final seasoning. Let each element shine while inviting the eye to feast first.”

Arrange sides in small ramekins or mason jars for rustic charm. Drizzle extra sauce around the plate’s edge for dramatic flair. Remember: the joy of Southern cooking lies in sharing. Serve family-style on a large platter to encourage second helpings and conversation.

Storage and Reheating: Keeping It Fresh

Airtight containers are the unsung heroes of meal prep. Proper techniques ensure your hard work in the kitchen pays off days later. Whether saving portions for lunches or planning ahead, smart storage preserves texture and flavor.

Best Practices for Leftover Storage

Cool your dish completely before storing—about 30 minutes at room temperature. Transfer portions to shallow containers to speed cooling. Never leave food out longer than two hours to prevent bacterial growth.

Glass or BPA-free plastic containers with tight seals work best. They lock in moisture while keeping odors out. For chicken gravy, press plastic wrap directly onto the surface before sealing. This prevents skin formation.

Reheat gently to maintain quality. Simmer chicken gravy in a saucepan over low heat, stirring occasionally. For chicken breasts, cover with foil and bake at 325°F until warmed through. Add a splash of broth if needed.

Transform leftovers into new meals. Shredded meat makes excellent tacos or wraps. Mix mashed potatoes with an egg and onion powder, then pan-fry as crispy cakes. Stir gravy into soups for instant depth.

Label containers with dates and consume within three days. Freeze portions in individual servings for up to three months. Thaw overnight in the fridge before reheating.

“The right container is like a time capsule for flavor,”

Store mashed potatoes separately to maintain their creamy texture. Sprinkle a pinch of onion powder when reheating chicken breasts for an extra flavor boost. With these steps, your next-day meal will taste as vibrant as the first serving.

Scaling Up: Meal Prep and Larger Gatherings

Hosting a crowd doesn’t mean sacrificing flavor—it’s about smart scaling. Whether prepping meals for the week or feeding extended family, a few adjustments ensure every plate delivers that signature comfort. Start by doubling ingredients systematically, focusing on ratios rather than guesswork.

Mastering Quantity Without Losing Quality

Key components like all-purpose flour need precise measurement when increasing portions. For every six additional servings, add 1½ cups of flour to maintain the dredging balance. Monitor oil temperature closely—crowded pans drop heat, risking uneven browning.

Ingredient6 Servings12 Servings
All-Purpose Flour1 cup2½ cups
Broth3 cups6 cups
Onions2 medium4 large

Watch for that golden brown crust—it’s your visual cue for proper searing. Cook in batches if needed, allowing the skillet to reheat between groups. This prevents steaming and ensures crispiness.

Portion cooked pieces into airtight containers within two hours. Layer gravy separately to preserve texture. Reheat gently with a splash of broth to revive freshness.

“Doubling a recipe? Double your attention to detail—especially during browning. That golden brown crust can’t be rushed.”

Leftovers stay fresh up to four days refrigerated. Freeze extras in labeled airtight containers for up to three months. Thaw overnight before reheating to serve smothered perfection again.

Preparing larger quantities means more opportunities to share. Extra portions become next-day lunches or freezer staples, ready to bring warmth to busy evenings. Ready to serve smothered dishes that taste like they just left the skillet.

Conclusion

The heart of Southern cooking lies in shared stories and well-loved pans. This recipe’s magic unfolds through simple steps: dredging seasoned pieces, achieving that golden crust, and letting rich broth work its slow-simmer alchemy. Your choice of pan matters—it’s the engine for even heat distribution and flavor-packed fond.

Homemade broth elevates the gravy from good to unforgettable. Don’t hesitate to tweak spice blends using precise teaspoon measurements. These authentic recipes thrive on personal touches—add smoked paprika or fresh thyme to make them yours.

Share your creations with fellow cooks. Post photos of that glossy gravy or crispy edges. Every variation keeps tradition alive while writing new chapters. Whether served at Sunday supper or Tuesday dinner, this dish remains a testament to heritage—warm, welcoming, and endlessly satisfying.

Grab your trusted skillet. Invite loved ones. Let the aromas of caramelized onions and savory spices fill your kitchen again. That’s how legacies simmer onward.

FAQ

Can I use boneless cuts instead of bone-in for this recipe?

Yes, boneless thighs or breasts work, but bone-in pieces add deeper flavor to the gravy. Adjust cooking time by 5–7 minutes to prevent dryness.

How do I prevent the flour from clumping when making gravy?

Whisk constantly while slowly adding broth to the skillet. A silicone-coated whisk helps scrape up browned bits for a smooth texture.

What sides pair best with this dish?

Creamy mashed potatoes, collard greens, or buttermilk biscuits soak up the rich gravy. Cornbread also adds a sweet contrast to savory flavors.

Can I prepare this ahead for meal prep?

Store cooked portions in an airtight container for up to 3 days. Reheat gently on the stovetop with a splash of broth to revive the gravy’s consistency.

Is there a gluten-free alternative to all-purpose flour?

Substitute cornstarch or a 1:1 gluten-free flour blend. Mix with seasonings before coating the meat for similar browning results.

How do I achieve crispy skin without burning the garlic?

Sear the meat skin-side down first on medium-high heat, then reduce to medium when adding aromatics. Stir spices like paprika quickly to avoid bitterness.

Can I freeze leftovers for later use?

Freeze portions in airtight containers for up to 2 months. Thaw overnight in the fridge before reheating to preserve texture.

External Resources for Best Results:

Looking to explore more healthy chicken bowlslow-carb chicken recipes, or broccoli recipes for dinner? Head over to www.whatfordinner.com for expert-crafted, nutrition-focused meal ideas.

Leave a Comment